Wednesday, January 25, 2023

Owasp-zap


OWASP ZAP (short for Zed Attack Proxy) is an open-source web application security scanner. It is intended to be used by both those new to application security as well as professional penetration testers.

OWASP ZAP
Stable release
2.11.1 / 10 December 2021; 13 months ago
Repository
Written inJava
Operating systemLinuxWindowsOS X
Available in25[1] languages
TypeComputer security
LicenseApache Licence
Websitewww.zaproxy.org

It is one of the most active Open Web Application Security Project (OWASP) projects[2] and has been given Flagship status.[3]

When used as a proxy server it allows the user to manipulate all of the traffic that passes through it, including traffic using HTTPS.

It can also run in a daemon mode which is then controlled via a REST API.

ZAP was added to the ThoughtWorks Technology Radar on May 30, 2015 in the Trial ring.[4]

ZAP was originally forked from Paros, another pentesting proxy. Simon Bennetts, the project lead, stated in 2014 that only 20% of ZAP's source code was still from Paros.[5]

FeaturesEdit

Some of the built in features include:

It has a plugin-based architecture and an online ‘marketplace’ which allows new or updated features to be added. The GUI control panel has been described as easy to use.[6]

AwardsEdit

  • One of the OWASP tools referred to in the 2015 Bossie award for The best open source networking and security software[7]
  • Second place in the Top Security Tools of 2014 as voted by ToolsWatch.org readers[8]
  • Top Security Tool of 2013 as voted by ToolsWatch.org readers[9]
  • Toolsmith Tool of the Year for 2011[10]

Thursday, January 19, 2023

Kismet

Kismet is a layer 2 Wi-Fi network analysis tool. It is very good in pentest in a corporate environment. It works with any wireless network cards that supports original/raw/radio frequency monitor mode(rfmon). in this tutorial post we will learn how to use Kismet to monitor Wi-Fi networks.

To use it, enable monitor mode in the wireless card and type following command in terminal:

airmon-ng start wlan0

Then open another terminal window and type kismet just like following and hit enter:

kismet

Click on OK and then click "Yes" when it asks to start Kismet Server. Otherwise it will stop work. Just like following screenshot.


Next we need to specify the source interface, in our case it is wlan0 so we type wlan0. Make sure that that this interface is in monitor mode before opening Kismet.


Now we will see a list of all the Wi-Fi networks near us:


By default, Kismet listens all the channels so we need to specify a particular channel by selecting the Config Channel from the Kismet menu like the following screenshot :


We can select the number of channel here:


Kismet also allows us to see the signal of noise radio. If we want to see that we need to select Channel Details in the Windows section:


The signal to noise radio helps us during times of wardriving.

Tuesday, January 17, 2023

aircrack-ng


Aircrack-ng is the go-to tool for analyzing and cracking wireless networks. All the various tools within it use a command line interface and are set up for scripting. This is good news for veteran security professionals, but an open-source Linux orientation may challenge those more used to proprietary tools running on Windows platforms.

Type of tool: Wireless network analyzer and attacker

Key features: Aircrack-ng is a set of utilities for analyzing WiFi networks for weaknesses. You can use it to monitor WiFi security, capture data packets and export them to text files for additional analysis. Capture and injection of WiFi cards can be done to verify their performance. And pen testers can use it to attack and crack WPA and WEP protocols.

This is an open source product available from SecTools. Its focus is 802.11 wireless LANs, with tools available to sniff wireless packets, intercept them and log traffic, manage wireless drivers, recover lost keys, and detect issues and crack WPA and WEP.

Aircrack-ng was originally designed for Linux but its functionality has been extended to include Windows, OS X, FreeBSD, OpenBSD, NetBSD, Solaris and eComStation 2. By injecting enough frames into wireless traffic, it can eventually crack WEP and WPA-PSK keys.

Monday, January 16, 2023

How to install Metasploit on window

 How to Install Metasploit on Windows 10 RDP

0
(0)

Metasploit is a computer security project that provides information on security vulnerabilities and helps with IDS intrusion testing and signature development. This program is written in Ruby programming language. Metasploit is an open-source framework written specifically for hackers, security researchers, and other network security activists. You can use this framework to exploit vulnerabilities in various systems, networks, and software and infiltrate these systems. This application has many exploits by default, but in addition, you can create your own exploit and add to it. In this article, we are going to teach you How to Install Metasploit on Windows 10 RDP. It should be noted that you can visit the packages available in Eldernode to purchase a Windows VPS server.

Table of Contents

Tutorial Install Metasploit on Windows 10 RDP

The exploit is malicious code written by a hacker for a security hole. Basically, when a vulnerability is found, for example, you have to work 10 steps and enter different codes to be able to exploit that vulnerability. But when you write exploits, you simplify the task and you can use vulnerabilities by doing a few simple steps.

Hackers write exploits for two reasons:

1- Proof of vulnerability

2- The possibility of using that vulnerability by other security researchers

Working with some exploits requires specialized knowledge. But Metasploit solves this problem altogether. Metasploit has many exploits in different fields in its heart and you just have to select the desired exploit according to the victim system and start the penetration testing operation.

In the next section, we will discuss the modules of Metasploit. Then we will teach you How to Install Metasploit on Windows 10 RDP. Please join us.

Recommended Article: Connect remotedesktopmanager Remote Desktop On Windows 10

Metasploit(MSF) modules

In Metasploit, modules are embedding in various categories that we want to examine:

1- Exploits

Exploits are codes that an attacker can use to gain access to a vulnerability system.

2- Payloads

Payloads are modules commonly using in exploits. These codes are actually what we want to do with the exploit. For example, if we want to add a user to the system, we must use the payload related to adding the user in Metasploit.

3- Auxiliaries

These modules are using for tasks such as Scanning in Metasploit.

In the next section, we will discuss how to install Metasploit on Windows 10 RDP.

Install Metasploit on Windows 10

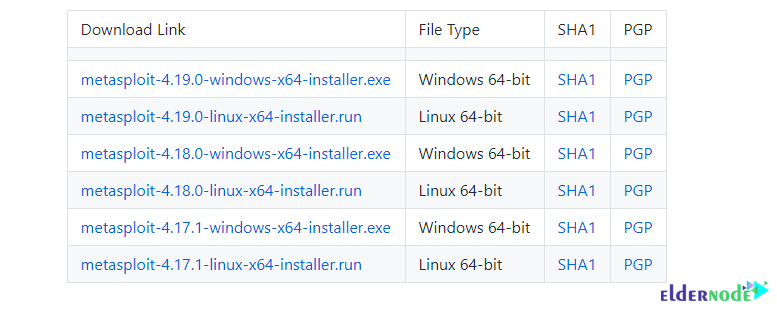
In this section, we want to teach you how to install Metasploit on Windows 10 RDP. To do this, just follow the steps below. In the first step, you need to download the latest Metasploit Windows installer.


how to download


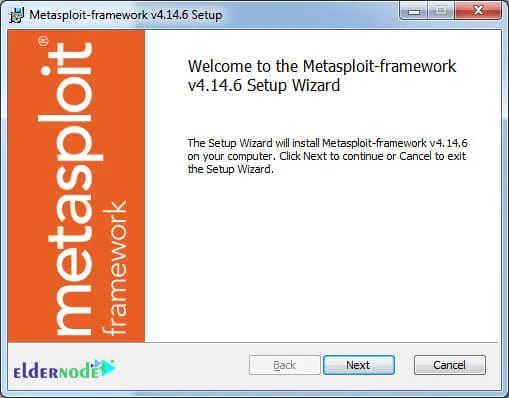
Once you have successfully downloaded the file, go to the location where you downloaded the installation file. Double-click it to start the installation process. In the window that opens, click Next.


how to install msf


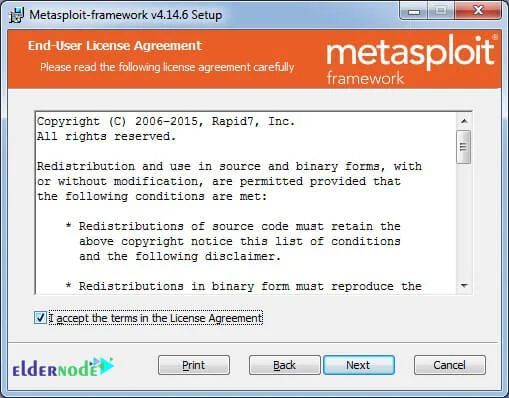
Check I accept the terms… and then click Next.


license agreement of metasploit on windows


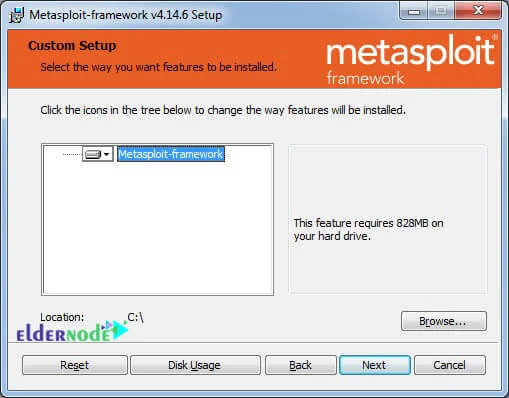
Next, you need to specify where you want the Metasploit Framework to be installed. Click Next again.


destination path


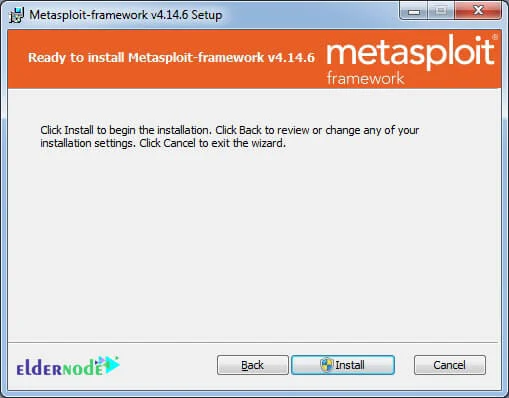
Then click on Install.


installing metasploit on windows 10 rdp

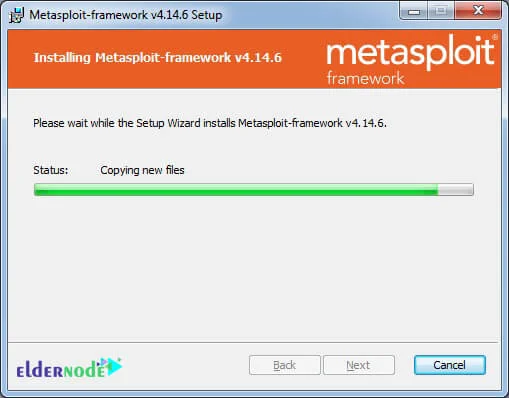
*

installing msf on windows server


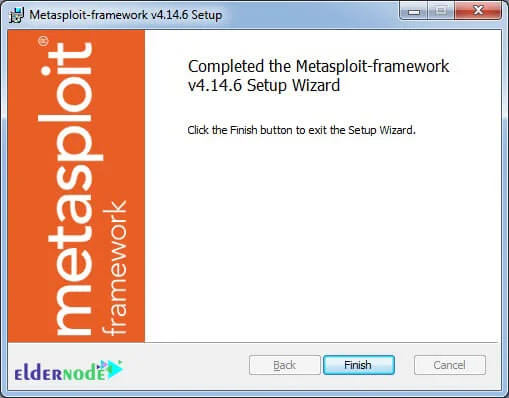
Finally, click on Finish to complete the installation process successfully.


how to install metasploit framework on windows 10


How to access and use Metasploit on windows 10 RDP Admin

After you have successfully completed the above steps, in this section you will learn how to access and use the Metasploit Framework. To do this via the command line, just press the Windows Key+R.

In the Run window, type cmd and press Enter.

Now, using cd, navigate to the folder/path where you installed the Metasploit Framework.

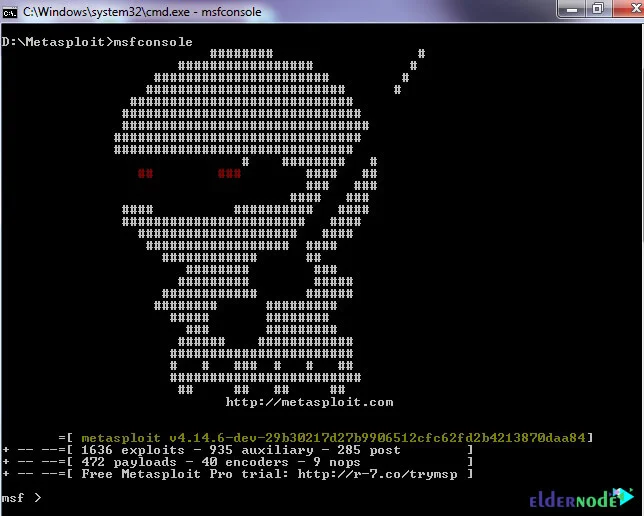
In the next step, type msfconsole and press enter. By executing this command, you should see the following image:


Console

Sunday, January 15, 2023

How to setup kali on virtual box


 Kali Linux is a Debian-based Linux distribution developed for penetration testing, and is especially useful for security specialists and enthusiasts. Kali Linux, formerly known as BackTrack Linux, includes a lot of tools and applications for network audits. Kali can be run as a Live DVD, and can be installed on a computer as a host operating system (OS) as any other Linux. However, it is not recommended that you use Kali as a general purpose desktop operating system. At the same time, when using Kali Live DVD, settings are not saved after a system reboot. In this situation, virtual machines can be of great help. Today’s blog post explores how to install Kali Linux on VirtualBox as a virtual machine (VM).

The advantages of installing Kali Linux on VirtualBox are:

  • By running multiple operating systems simultaneously (a host OS and a guest OS or multiple guests), you don’t need to reboot a computer as when using dual boot.
  • A VM running Kali Linux is isolated from your host OS - running Kali on a VM in an isolated environment is secure.
  • You can take a snapshot and roll back to the previous VM state if something goes wrong. The risk of harm to Kali Linux on a VM is minimal as a result.
  • You can copy a configured VM on which Kali Linux is installed to other computers.
  • You can attach physical USB devices, such as external network adapters directly to a VM due to the VirtualBox USB pass-through feature.

Make sure that VirtualBox is installed on your host operating system before continuing, using the latest VirtualBox version if possible. Please install VirtualBox Extension Pack on your host machine to use some advanced features such as USB pass-through. In the today’s blog post, you will learn how to install Kali Linux on VirtualBox on Windows 10. If you wish to know how to install Kali Linux on VirtualBox on Mac, don’t worry – the installation principle is the same, due to the universality and multiplatform nature of VirtualBox. The installation algorithm is similar as that for installing Ubuntu on VirtualBox.

ETHIO HACK   htrps://cyberbegna.ga

Downloading the Installation Image of Kali Linux

First, go to the official web site and download the ISO image of Kali Linux. There are multiple 32-bit and 64-bit images that have different graphical user interfaces (Gnome, KDE, XFCE, LXDE etc.). Let’s download Kali Linux 64-bit v.2019.2 – this distribution has Gnome as a graphical user interface (GUI). You can download images via HTTP and Torrent protocols. Save the ISO file to a custom folder, for example, C:\VirtualBox\kali-linux-2019.2-amd64.iso. You can also verify the SHA256 check sum to make sure that your image is consistent after finishing downloading.

Kali Linux on VirtualBox – downloading the installation ISO image of Kali Linux 64-bit

Creating a New VM

Once you have downloaded the installation image, you can create a new VM. Open VirtualBox and create a new VM (Machine > New or Ctrl+N) on which Kali Linux will be installed.

How to install Kali Linux on VirtualBox – creating a new VM

Set the following VM parameters:

Name: Kali_x64

Machine Folder: C:\Virtual\VirtualBox (This path is used only for demo purpose. Try not to use a system partition to store VMs).

Type: Linux

Version: Debian (64-bit)

Memory size: 4096 MB. The VM memory size must be large enough to run a guest OS, though you should leave enough unallocated memory to run your host OS. In the current example, a host machine with 16 GB of RAM is used, which provides enough memory left for a host OS.

Hard disk: Create a virtual hard disk now.

Hit Create to continue and configure a new virtual hard disk.

Installing Kali Linux on VirtualBox – creating a new virtual hard disk

Set the virtual disk file location, for example C:\Virtual\VirtualBox\Kali_x6Kali_x64.vdi

It is recommended that you store virtual disk files in the VM folder (such folder is selected by default).

Set the virtual disk file size. It should be at least 20 GB.

Hard disk file type: VDI. A native VirtualBox format is selected.

Storage on physical disk: Dynamically allocated (the analog of thin provisioning in VMware).

Click Create to finish creating a new VM.

How to install Kali Linux on VirtualBox – configuring virtual disk settings for a new VM

After creating a new VM, some additional settings must be configured. Select your recently created virtual machine and open the VM settings.

How to install Kali Linux on VirtualBox Windows 10 – starting a new VM created before

Display options

Go to Display > Screen and set Video Memory to 128 MB. It will prevent installer hanging.

Next, tick the checkbox Enable 3D acceleration (optional). It will be useful for applications that need 3D acceleration.

Kali Linux on VirtualBox – configuring display settings for the VM

Network options

Next, go to the network settings and select the networking mode of the virtual network adapter of the VM. Let’s select the Bridged mode to use the VM network adapter much as you would for a physical network adapter of the host machine. In this case, the VM network adapter is connected to the same physical network as the host machine. You can set additional options such as network adapter name, type, MAC address etc.

Kali Linux on VirtualBox – configuring VM network settings

Boot options

You have to insert your virtual ISO DVD image to a virtual DVD drive of the VM and then boot a virtual machine from that ISO disk. In the VM settings, go to Storage, select an IDE controller of your virtual optical drive (it is empty by default). Click the empty status, then click the disc icon near IDE Secondary Master and in the opened menu, select Choose Virtual Optical Disk File. Browse the Kali Linux installation ISO image that you have downloaded from the official site before (kali-linux-2019.2-amd64.iso). Hit OK to save settings.

How to install Kali Linux on VirtualBox – selecting the ISO installation image to boot from

The Step-By-Step Process of Installing Kali Linux on VirtualBox

Now you can start your new VM (Kali_x64 in this case) and begin the Kali installation.

Kali Linux on VirtualBox – starting a new VM for Kali Linux installation

After booting from a virtual DVD, you will see a boot menu where you can select boot options for Kali Linux such as Boot from Live DVDInstall, Graphical Install etc. Let’s select Graphical Install. Press Enter to continue.

Installing Kali Linux on VirtualBox – select Graphical install

Select a language. Choose the language you wish to use for the installation process and the installed system. English is selected for the current installation. Click the Continue button on each screen to move forward.

Installing Kali Linux on VirtualBox – selecting the language

Select your location. This option is used to set your time zone, time format, etc. United States has been selected in the current example.

Installing Kali Linux on VirtualBox – select your location

Configure the keyboard. Select your keyboard layout. American English is used for the current installation.

How to install Kali Linux on VirtualBox Windows 10 – configuring the keyboard

Configure the network. Enter the hostname for your Linux system, for example, kali-virtualbox.

How to install Kali Linux on VirtualBox – configuring the hostname

Configure the domain name. If you don’t use a domain in your network, you may leave this field empty.

How to install Kali Linux on VirtualBox – configuring the domain name

Set up users and passwords. Read the useful tips on this screen and enter the password for root.

How to install Kali Linux on VirtualBox – setting up users and passwords

Configure the clock. Now you can select a precise time zone for your country.

How to install Kali Linux on VirtualBox – configuring the clock

Partition disks. You can use manual and guided partitioning of disks. For the first time, you can select Guided – use entire disk. The entire disk will be used for creating one big partition.

How to install Kali Linux on VirtualBox – partitioning a disk for a VM on which Kali will be installed

Confirm that you want to erase the disk. There is no reason to worry, as in this case, the empty 20-GB virtual disk is used for partitioning.

How to install Kali Linux on VirtualBox – disk partitioning

Select a preferred partitioning scheme for your virtual disk. Let’s select All files in one partition.

Kali Linux disk partitioning – all files in one partition

Check the overview and select Finish partitioning and write changes to disk.

Installing Kali Linux on VirtualBox – finishing disk partitioning

Select Yes and confirm that you would like to write changes to the disk.

Installing Kali on VirtualBox – confirmation of writing changes to the disk after creating partitions

Wait for the system to be installed. As Kali Linux is being installed, the files are being copied to the virtual disk of the VM.

Installing Kali Linux on VirtualBox

Configure the package manager. Click Yes if you would like to use a network mirror. Selecting this option will allow you to install or update application packages from online software repositories.

Installing Kali Linux on VirtualBox – configuring a network mirror

Enter the information about your proxy server if you use a proxy server for internet access from your network. There is no proxy server in this example; so this field is left empty.

How to install Kali Linux on VirtualBox – configuring HTTP proxy for the package manager

Install the GRUB boot loader on a hard disk. Since there is no other operating systems and boot loaders on a virtual disk, it is necessary to install GRUB in this case. Select Yes to install GRUB.

Kali Linux on VirtualBox – installing the GRUB boot loader

Select a disk to which GRUB must be installed. In this case, /dev/sda is the necessary disk and is the only disk connected to a VM.

Kali Linux on VirtualBox - installing GRUB on /dev/sda

Finish the installation. When the installation of Kali Linux on VirtualBox is complete, you will see a notification message. Now you can reboot the virtual machine to boot the Kali Linux installed on the VirtualBox VM.

Kali Linux on VirtualBox – installation is complete

After the reboot, you will see a login screen of Kali Linux. Enter root as a user name, then enter the password set during installing Kali Linux on VirtualBox to sign in.

Kali Linux on VirtualBox – enter credentials to log in

Now you should see the Gnome desktop of Kali Linux installed on your VirtualBox virtual machine.

Kali Linux on VirtualBox – Gnome desktop of Kali Linux

New

Owasp-zap

  OWASP ZAP   (short for Zed Attack Proxy) is an   open-source   web application security scanner . It is intended to be used by both those ...